TPP Onboarding
This page explains how to onboard the TPP applications using the WSO2 API Manager Developer Portal.
Before you begin:
Configure WSO2 Identity Server as the Key Manager.
Step 1: Sign up as a TPP
-
Go to the Developer portal at
<https://<APIM_HOST>:9443/devportal>. -
Go to the Applications tab.

-
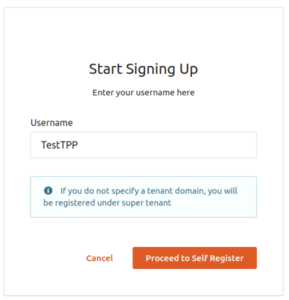
In the Sign-in form, click Create Account.
-
Provide a username and click Proceed Self Register.
-
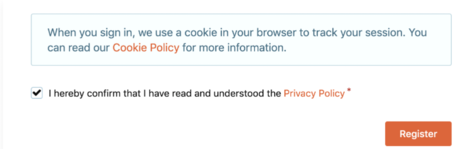
Fill out the Create New Account form to complete registration.
-
Read terms and conditions and click the checkbox to agree to the terms and conditions.
-
Click Register.
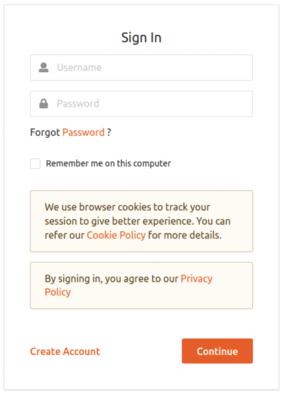
Step 2: Sign in to the Developer Portal as the TPP
-
Now, sign in to the Developer portal at
https://<APIM_HOST>:9443/devportalas the TPP. -
Enter the username and the password you entered when signing up as a TPP.
-
Click Continue. Now, you are on the home page of the Developer Portal.
Step 3: Create an application
-
In the Developer Portal, go to the Applications tab.
-
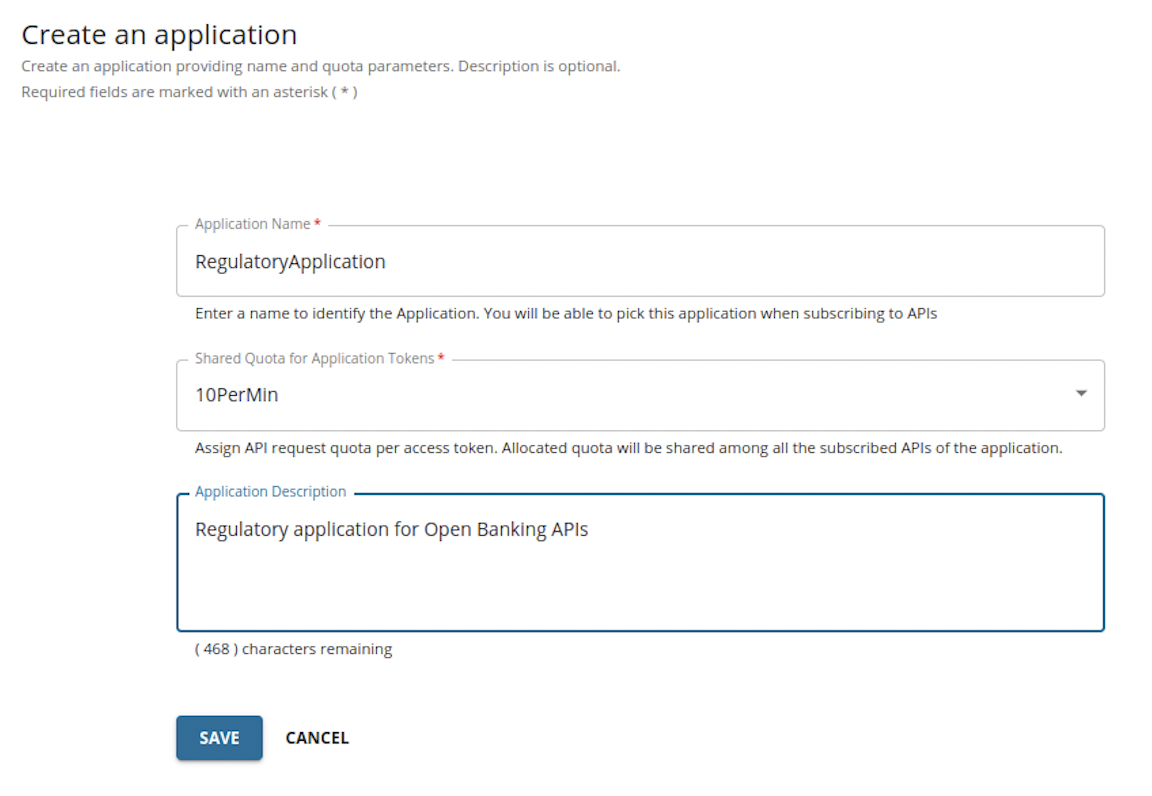
Click ADD NEW APPLICATION.

-
Enter the following application details.
-
Click SAVE. The Developer Portal displays the created application as follows:
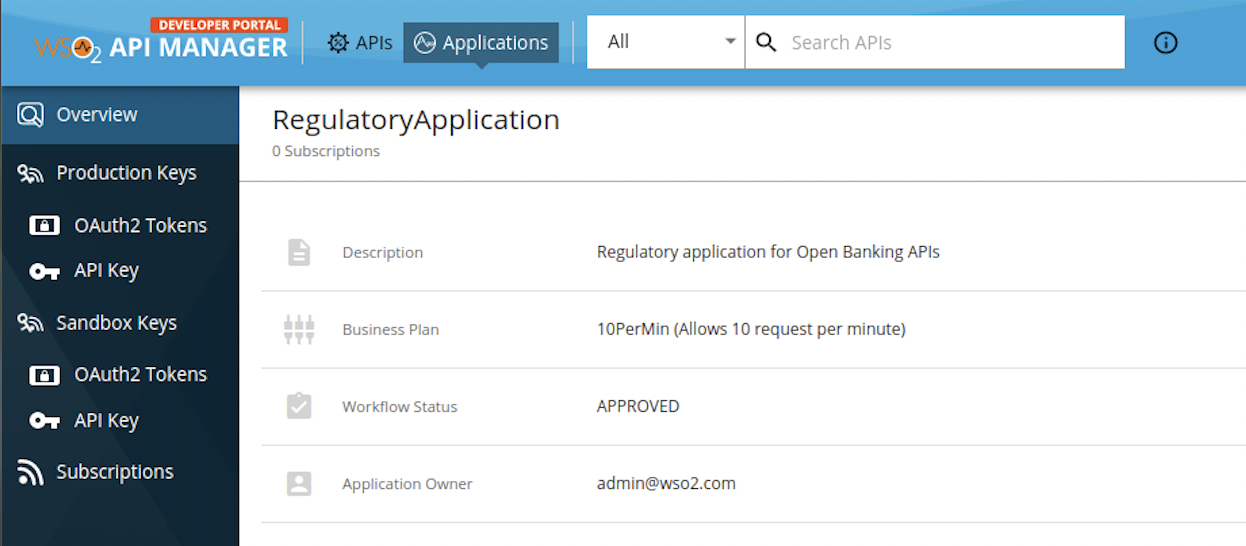
The application created via the Developer Portal allows you to observe statistics of APIs, subscribe to APIs, and access the subscribed APIs.
Step 4: Subscribe to API
-
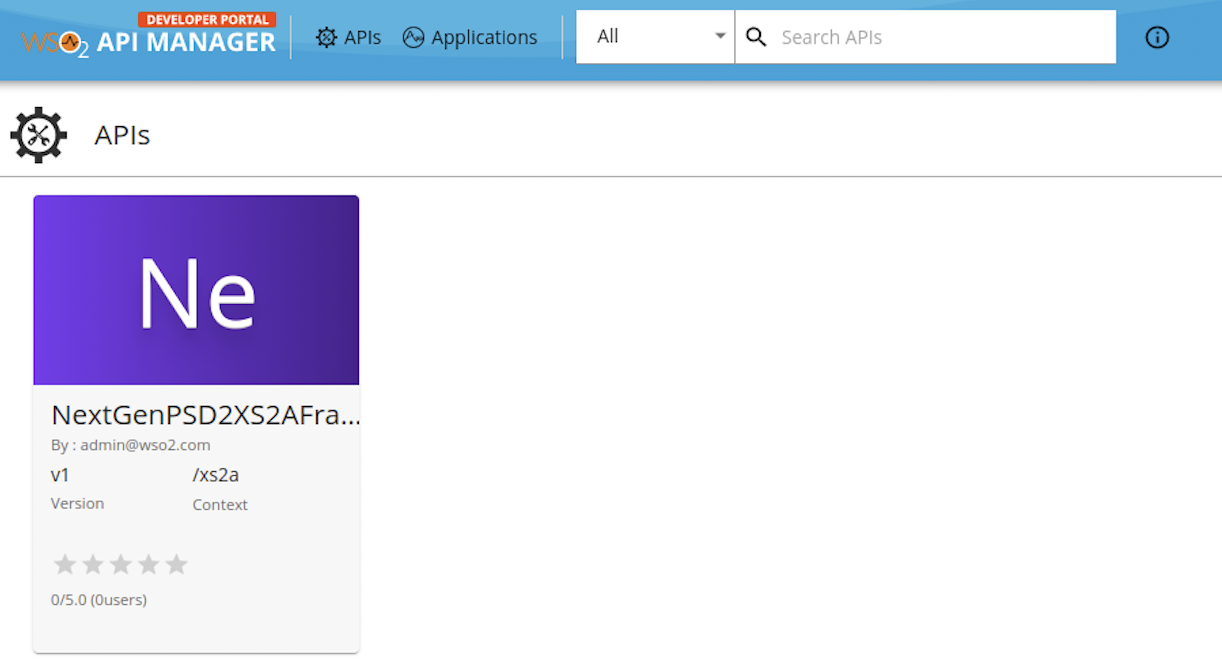
Go to the APIs tab in the Developer portal.

-
Select the NextGenPSD2XS2AFramework API.
-
Go to Subscriptions at the bottom of the API and select SUBSCRIBE.
-
Select your application from the drop-down list then set the Throttling Policy and click SUBSCRIBE. Once subscribed, the application can access all the supported services of the NextGenPSD2XS2AFramework API resources.
Step 5: Create and upload certificates
The TPP user needs to create certificates to validate whether the TPP is registered in a governing entity. It is verified in this step. You can use the sample certificates attached below:
Note
NextGenPSD2 Reference Toolkit provides Electronic Identification and Trust Services (eIDAS) validation services for TPP validation.
-
Download the root and issuer certificates found here.
-
Issue the given command and upload them to the client trust stores available in the following locations:
<APIM_HOME>/repository/resources/security/client-truststore.jks<IS_HOME>/repository/resources/security/client-truststore.jks
keytool -import -alias <alias> -file <certificate_location> -storetype JKS -keystore <truststore_location> -storepass wso2carbon -
Restart the Identity Server and API Manager.
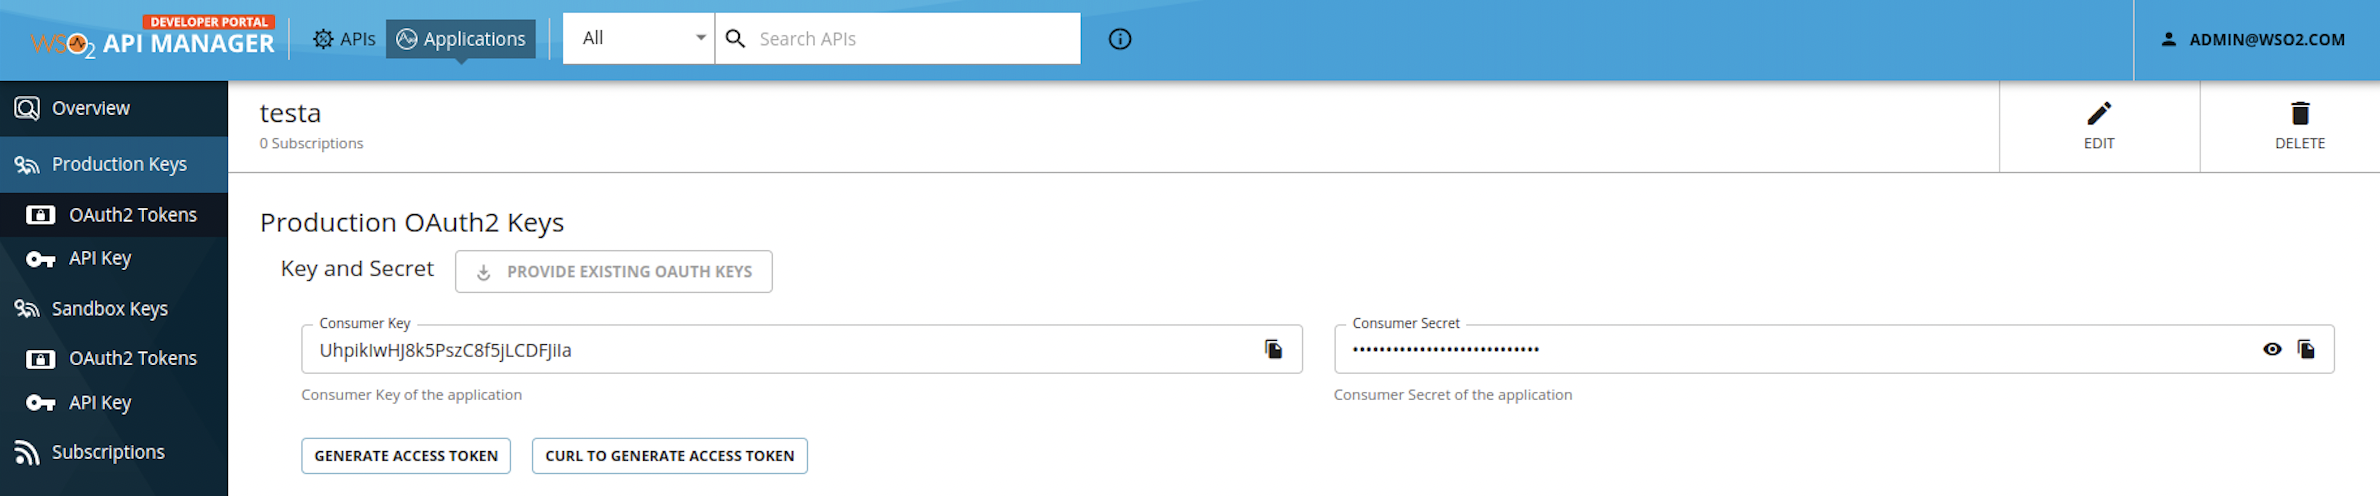
Step 6: Generate keys
The TPP application requires a Client ID (Consumer Key) to access the subscribed API.
-
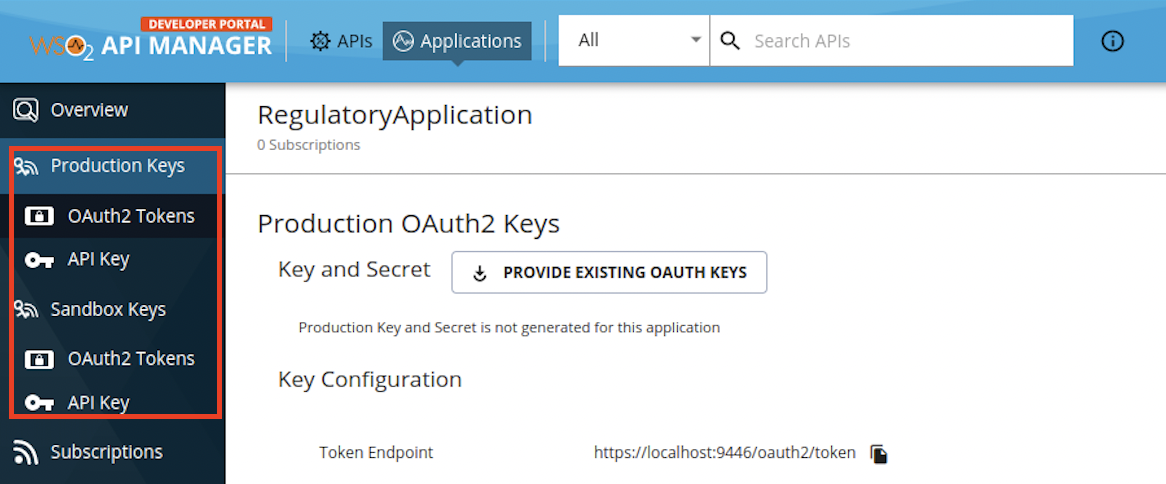
Go to the Applications tab in the Developer Portal.
-
From the application list, select your application, which has subscribed to the NextGenPSD2XS2AFramework API.
-
Select Production Keys > OAuth2 Tokens or Sandbox Keys > OAuth2 Tokens according to the type of key you require:
- Production Keys: Generates access tokens in the production environment.
- Sandbox Keys: Generates access tokens in the sandbox environment.
-
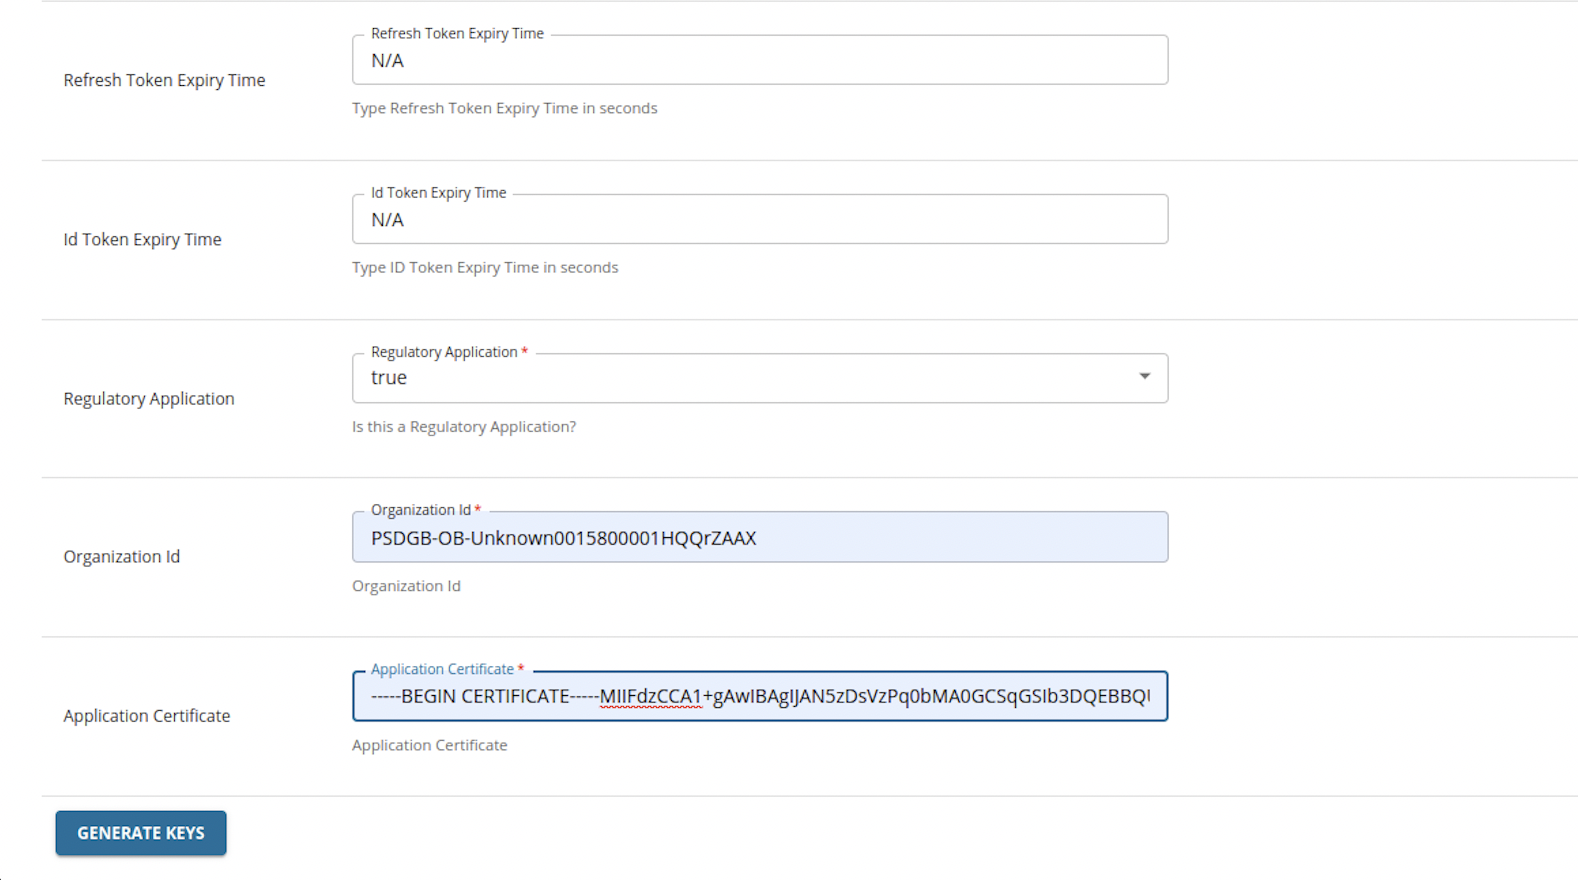
Provide the requested information as defined below:
Field Description Grant Types Determine the credentials that are used to generate the access token. - Code: Relates to the authorisation code grant type and is applicable when consuming the API as a user. It is mandatory to select the code grant type for regulatory applications.
- Client Credentials: Relates to the client credentials grant type and is applicable when consuming the API as an application.
- Refresh Token: To renew an expired access token.
Callback URL The URL used by the TPP to receive the authorization code sent from the bank. The authorisation code can be used later to generate an OAuth2 access token.
This is a mandatory field for the authorization code grant type.Regulatory Application The type of application. If your application is compliant with the NextGenPSD2XS2AFramework framework, it is a Regulatory application. Organization Id The Organization Identifier as provided in the application certificate. For example. PSDUK-NCA-OrganizationID Application Certificate This is the content of the application certificate (.PEM) that you created in the step above.
For testing purposes, you may use this sample application certificate.
For Regulatory applications, it is mandatory to use an application certificate. You can download the signing certificate for testing purposes
-
Click GENERATE KEYS to generate production or sandbox keys. It generates the consumer key and consumer secret.
Step 7: Generate application access token
-
Go to the Applications tab in the Developer Portal.
-
Select your application from the Application List.
-
View the keys you generated.
-
Note down the Consumer Key for your application.
-
Run the following cURL command in a command prompt to generate the access token. Update the placeholders with relevant values.
Use the sample certificates for testing purposes. Click here to see how it is done...
-
Download the cert.pem and upload it to the client trust stores as follows:
-
The client trust stores for the Identity Server and API Manager are located in the following locations:
<APIM_HOME>/repository/resources/security/client-truststore.jks-
<IS_HOME>/repository/resources/security/client-truststore.jks -
Use the following commands to add the certificate to the client trust store:
keytool -import -alias cert -file <PATH_TO_CERT.PEM> -keystore client-truststore.jks -storepass wso2carbon - Open the
<APIM_HOME>/repository/conf/deployment.tomlfile and update the following configurations. Add the relevant signature algorithm supported by the certificate to the following configuration. Sample certificate supportsSHA1withRSAsignature algorithm:
Configure the issuer of the certificate as below if the certificate needs to be skipped form revocation validation.supported_signature_algorithms = ["SHA256withRSA", "SHA512withRSA", "SHA1withRSA"]
Configure as below if the test certificates are used:[[open_banking.gateway.certificate_management.certificate.revocation.excluded]] issuer_dn = "EMAILADDRESS=<EMAIL_ADDRESS>, CN=<COMMON_NAME>, OU=<ORGANIZATIONAL_UNIT>, O=<ORGANIZATION>, L=<LOCALITY>, ST=<STATE/PROVINCE>, C=<COUNTRY>"[[open_banking.gateway.certificate_management.certificate.revocation.excluded]] issuer_dn = "[email protected], CN=OB, OU=OB, O=WSO2, L=COL, ST=WP, C=LK" -
Restart the servers.
-
Download the following certificates and keys, and use them for testing purposes. Use the transport private key and transport public certificate for Transport layer security testing purposes. Use the signing certificate and signing private keys for signing purposes.
-
curl -X POST \
https://<IS_HOST>:9446/oauth2/token \
--cert <TRANSPORT_PUBLIC_KEY_FILE_PATH> --key <TRANSPORT_PRIVATE_KEY_FILE_PATH> \
-d 'grant_type=client_credentials&scope=accounts&client_id=<CLIENT_ID>'-
Upon successful token generation, you can obtain an access token as follows:
{
   "access_token":"eyJ4NXQiOiJOVGRtWmpNNFpEazNOalkwWXpjNU1tWm1PRGd3TVRFM01XWXdOREU1TVdSbFpEZzROemM0WkEiLCJraWQiOiJNell4TW1Ga09HWXdNV0kwWldObU5EY3hOR1l3WW1NNFpUQTNNV0kyTkRBelpHUXpOR00wWkdSbE5qSmtPREZrWkRSaU9URmtNV0ZoTXpVMlpHVmxOZ19SUzI1NiIsImFsZyI6IlJTMjU2In0.eyJzdWIiOiJhZG1pbkB3c28yLmNvbUBjYXJib24uc3VwZXIiLCJhdXQiOiJBUFBMSUNBVElPTiIsImF1ZCI6IllEY0c0ZjQ5RzEza1dmVnNucWRoejhnYmEyd2EiLCJuYmYiOjE2Mjg3NDQ4NTYsImF6cCI6IllEY0c0ZjQ5RzEza1dmVnNucWRoejhnYmEyd2EiLCJzY29wZSI6ImFjY291bnRzIiwiaXNzIjoiaHR0cHM6XC9cL2xvY2FsaG9zdDo5NDQ2XC9vYXV0aDJcL3Rva2VuIiwiY25mIjp7Ing1dCNTMjU2IjoidllvVVlSU1E3Q2dvWXhOTVdXT3pDOHVOZlFyaXM0cFhRWDBabWl0Unh6cyJ9LCJleHAiOjE2Mjg3NDg0NTYsImlhdCI6MTYyODc0NDg1NiwianRpIjoiNzBjZDIzYzItMzYxZS00YTEwLWI4YTQtNzg2MTljZmQ2MWJmIn0.WT9d2ov9kfSe75Q6ia_VNvJ12lNkrkMZNWdHu_Ata_nEpM8AWj4Mtc0e8Yb0oZFif_ypNgBtE2ck29nQLFgQ1IicL_OMIFUuwykro2oOCcFAbz7o_rhGsh39aW-ORlxm11_csmNeaWZNfC7lPp-9hBmNt9Sons_pCm2beTMFreZQyywPrJoQ9vwt1QCmkAlTP33YnPrf0u0RQePQvUq81RiJiokhZvwVufHARZv8KLtS8VLrpfbEoSglON_XkumydVjvRWs17I3Ot9zUj6kndHBsqMPZdq_aNQHntftdSI7TVNj5f66Q_4Uafz_hMXADS46pw87rTgzENHHf-5SRhw",
   "scope":"accounts",
   "token_type":"Bearer",
   "expires_in":3600
}
Use this generated application access token to invoke the NextGenPSD2XS2AFramework API.
Top